Table of Contents
Here is the guide follow it step by step:
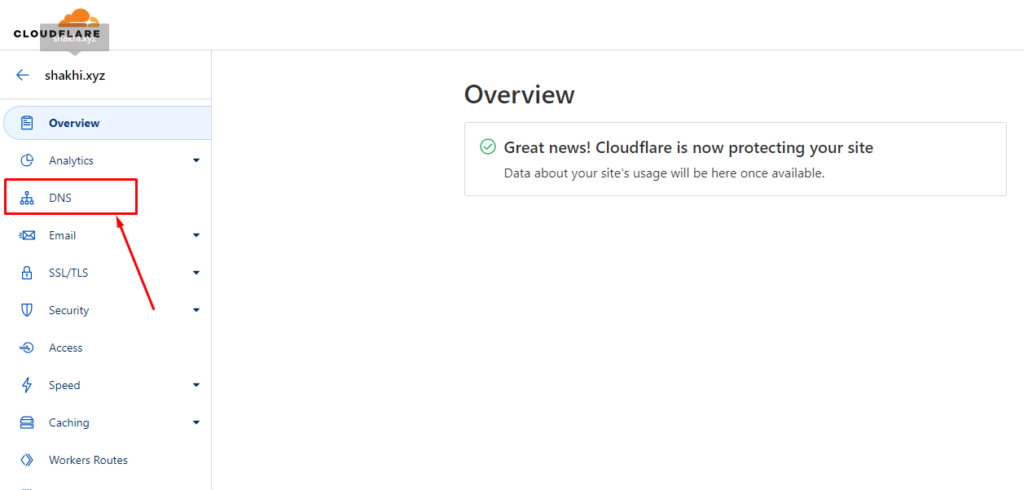
1. Log into your Cloudflare account. In the dashboard, you will see the domain hosted in Cloudflare. Click on the domain.

2. Go to DNS option.
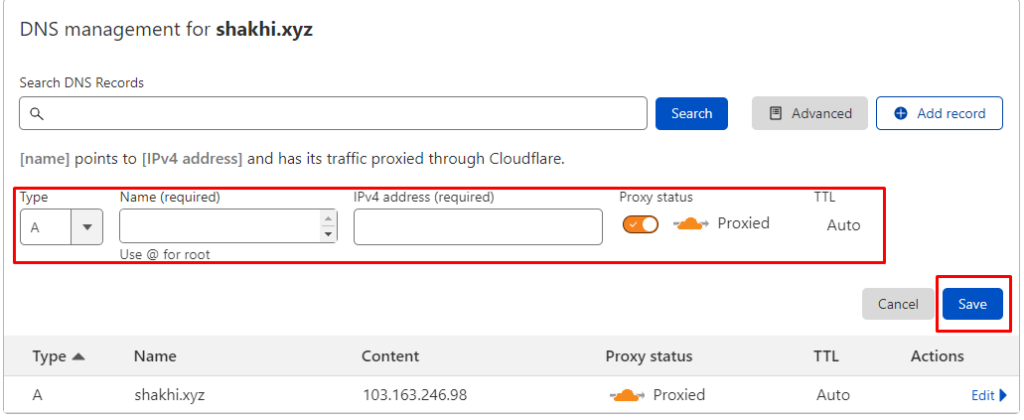
3. Here you can see the existing records of your domain in DNS management.

4. To add new record click on add record option.

5. Here choose your record type, and enter record name and address. Click on save to save the record.
6. To edit an existing record click on the edit option of that record.

7. Here you can change the record name and address. You can also delete the record from here. Click on save to save changes.
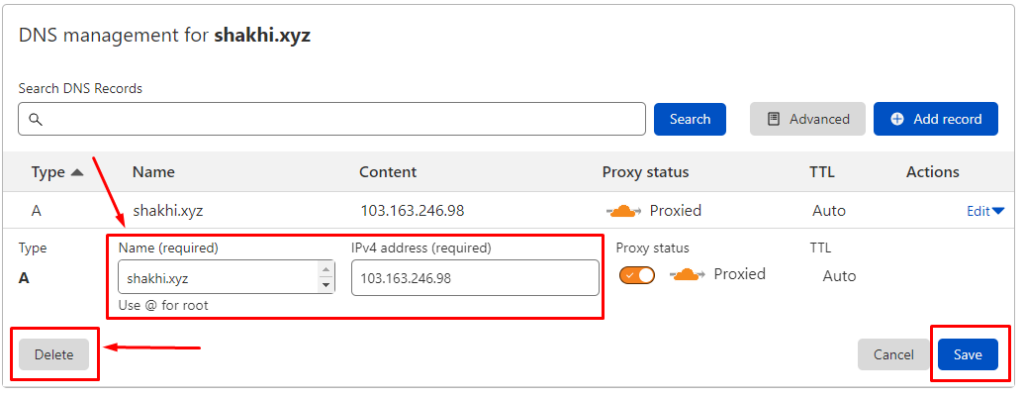
This is how you can manage the DNS records of your domain from Cloudflare.
If you face any issues in the process knock our technical support in the live chat. They will assist you.
Cloudflare
Cloudflare DNS Configuration
Cloudflare DNS Features
Cloudflare DNS Management
Cloudflare DNS Setup
Cloudflare DNS Tips
Cloudflare DNS Tools
Cloudflare DNS Tutorial
cPanel
hosting
Manage DNS Records Cloudflare
Update DNS Records Cloudflare


