Table of Contents
Introduction
The File Manager feature in your hosting control panel provides an easy-to-use web-based interface for managing your website files without the need for additional software. It allows you to upload, edit, delete, move, and organize files directly from your browser. Whether you need to update website content, modify configuration files, or manage backups, File Manager offers a convenient and efficient way to handle your hosting account’s files. In this guide, we’ll walk you through the key features and best practices for using File Manager effectively.
Accessing the cPanel File Manager
Once you log in to cPanel, you will see multiple sections with various icons. While we will cover all these in our upcoming cPanel Tutorial Series, for this tutorial, you need to click on the “File Manager” feature to proceed.
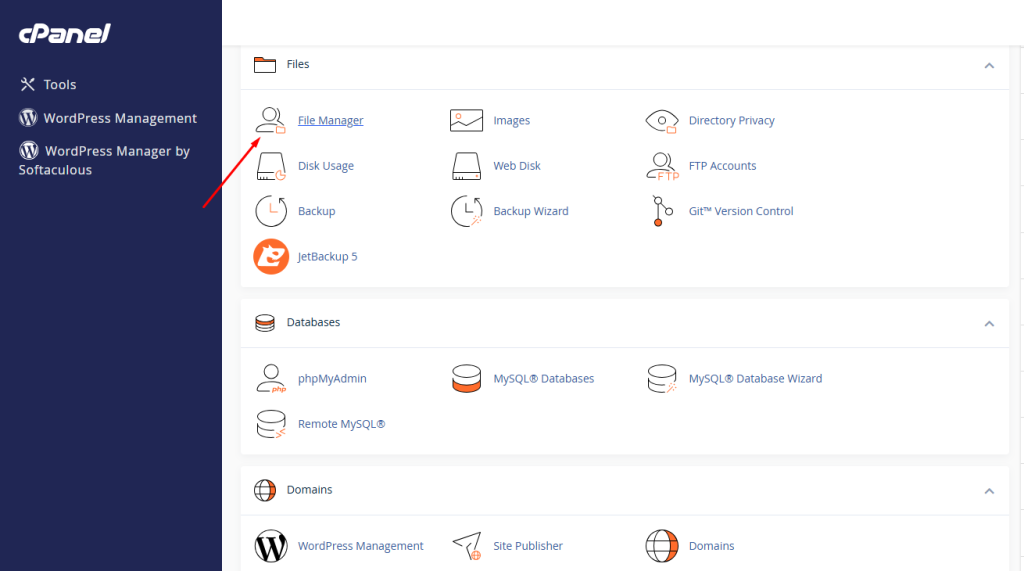
Once you click on the feature, you will be redirected to a new page where you can perform various file management actions.
Creating new Files/Folders
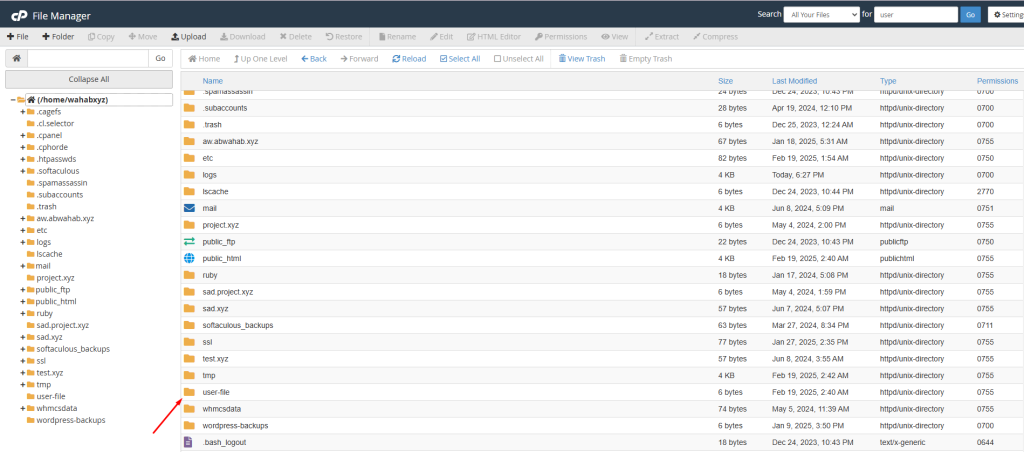
Now that you are familiar with the folders in your web hosting account, let’s create a new folder called “user-files” in the root directory. To do this, click on the “New Folder” button located in the Actions section.
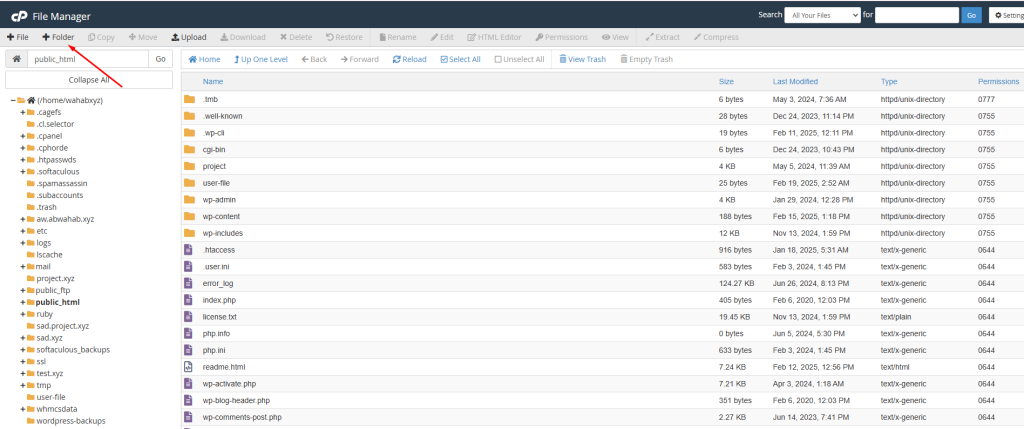
Clicking the “New Folder” button will open a configuration window titled “New Folder”, where you can enter the folder name. You can also specify the location by entering the relative path if you want to create the folder in a different directory. If no path is provided, the folder will be created in the currently selected location, as shown in the Folder Content View section.
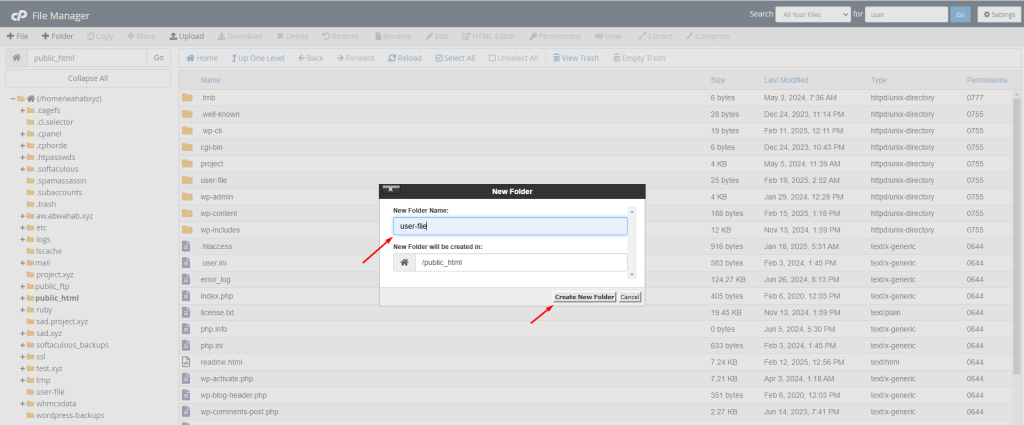
The final step is to create the folder. Locate and click the “Create New Folder” button. This will initiate the folder creation process, and your new folder will be created.
To add a file, double-click the folder in the “Folder Content View” to open it. Since it’s a new folder, it will currently be empty.
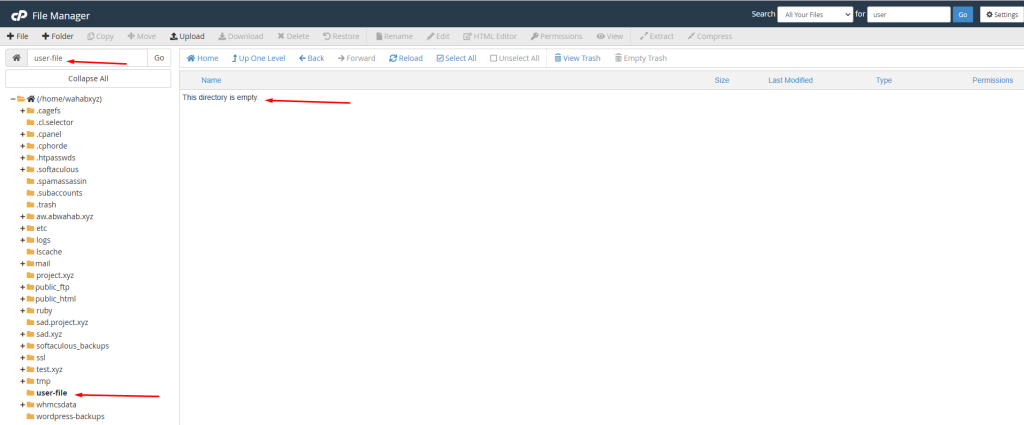
cPanel will highlight the active folder’s name in the “Folders Tree View.” This helps you keep track of your current location within the file system.
To create a new file, please click on the “New File” button from the Actions View section.
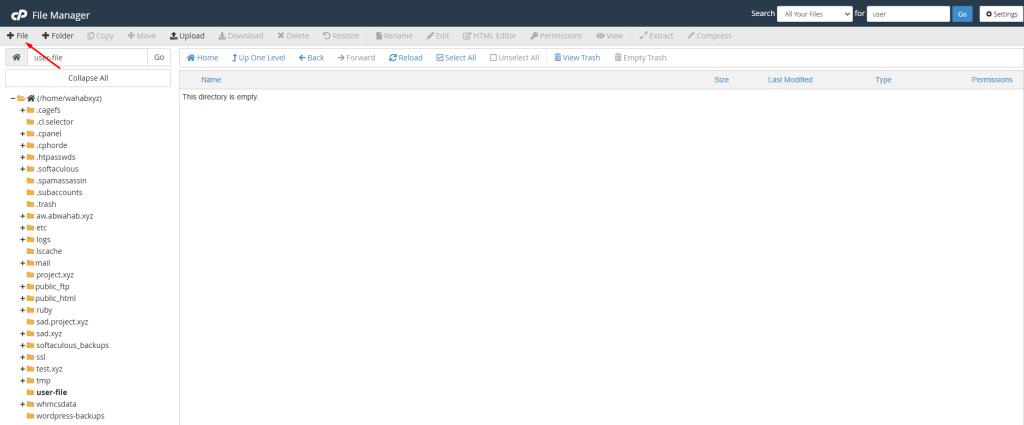
A new window will appear where you’ll name your file and specify its path. The path field is pre-filled with your current folder, so leave it as is or change it as needed.
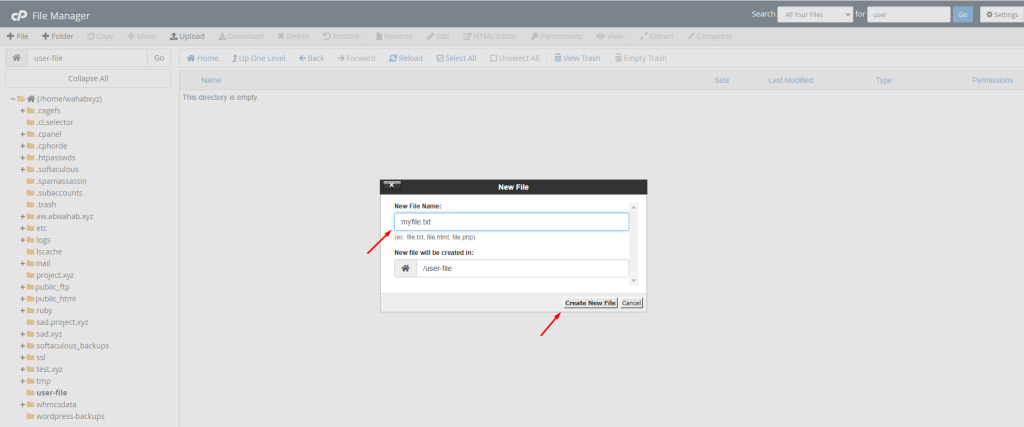
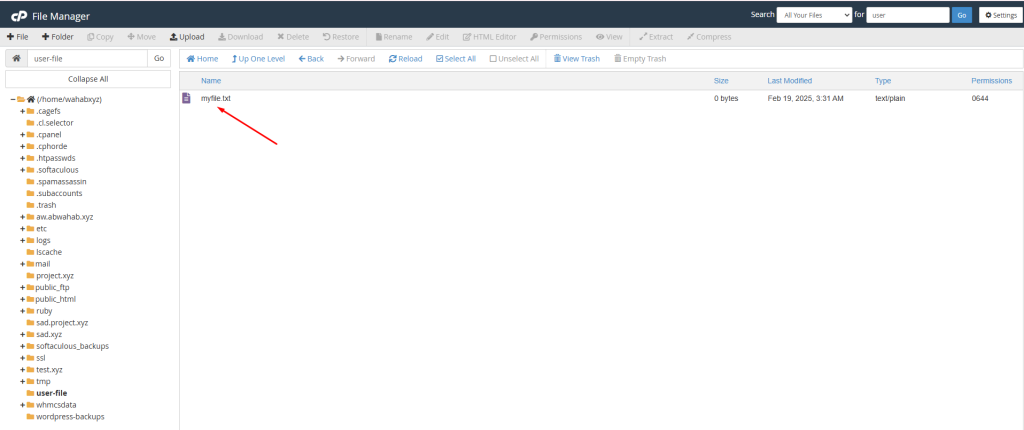
Click “Create New File” to finalize the file creation. Your new file will then be created.
Uploading/Downloading Files
Ensure the target folder is selected and visible in the “Folder Content View” before uploading. For this tutorial, we’ll continue working within the “user-files” folder.
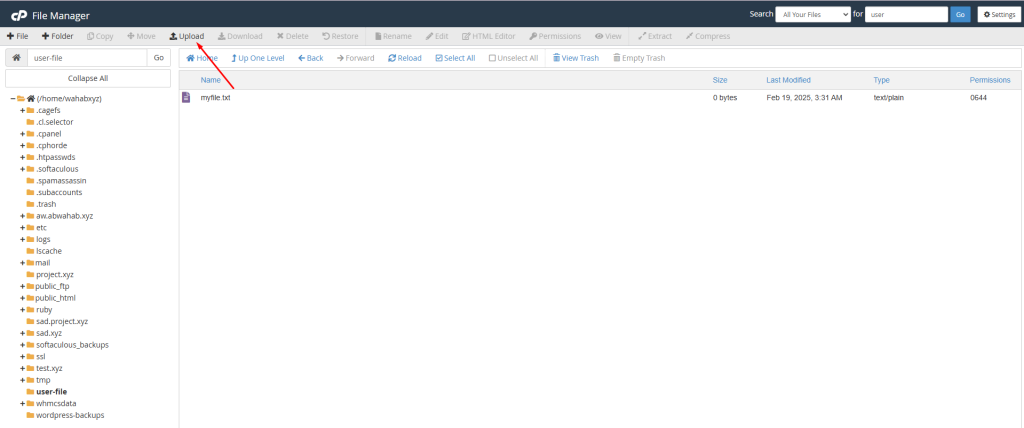
Clicking “Upload” will take you to a new page where you can choose a file to upload from your computer, either by selecting it or dragging and dropping it.
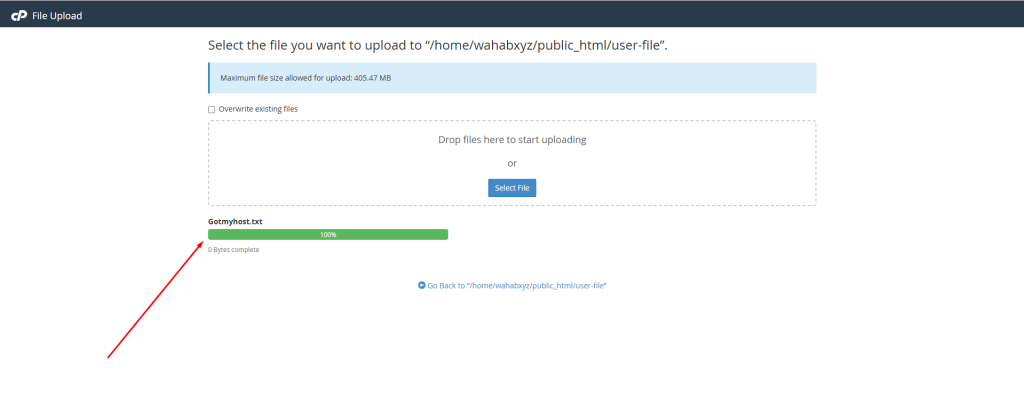
The selected file will begin uploading automatically. A progress bar will appear below the upload interface to track the upload’s progress. You can select multiple files for upload, and a separate progress bar will be displayed for each. Once the upload is complete, clicking the “Go Back to …” link below the file list will return you to the folder. You should now see your uploaded file(s) within that folder.
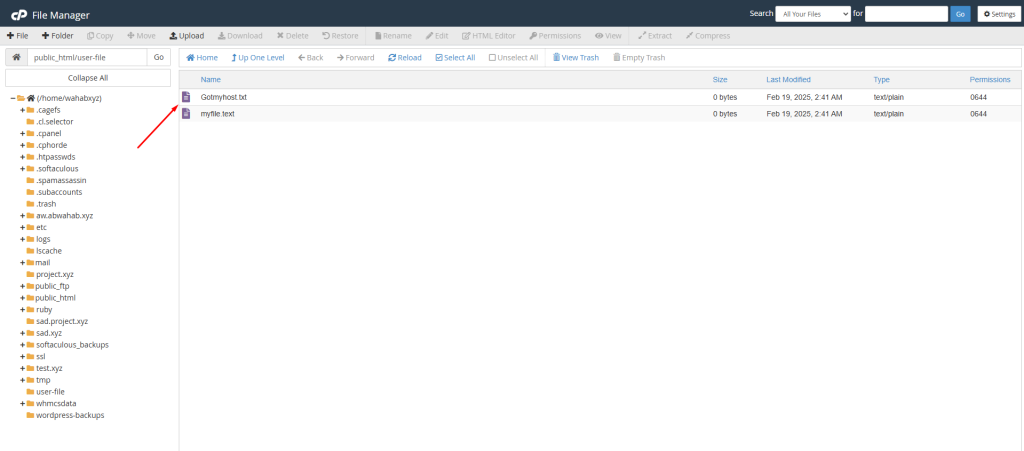
If you uploaded multiple files, they will all be displayed. Downloading is easy: select the file in the “Folder Content View” and click “Download” in the “Actions View.”
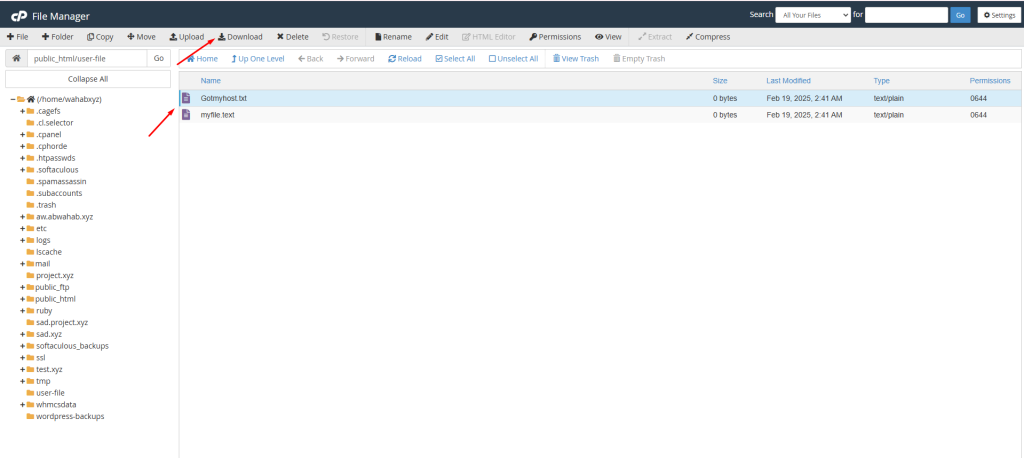
The file will download to your browser’s designated downloads folder (often “Downloads”). Check your browser settings if you’d like to change this location.
Deleting Files/Folders
To delete a file or folder, select it and click the “Delete” button in the “Actions View” section.
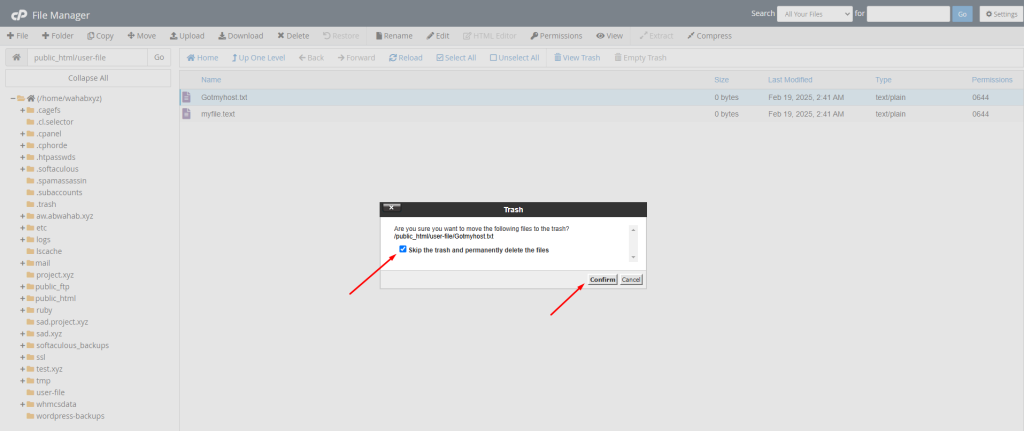
To prevent data loss, we strongly recommend downloading the file before deleting it permanently. This ensures you have a backup.
Renaming a file/folder
To rename a file or folder, select it and click the “Rename” button in the “Actions View” section.
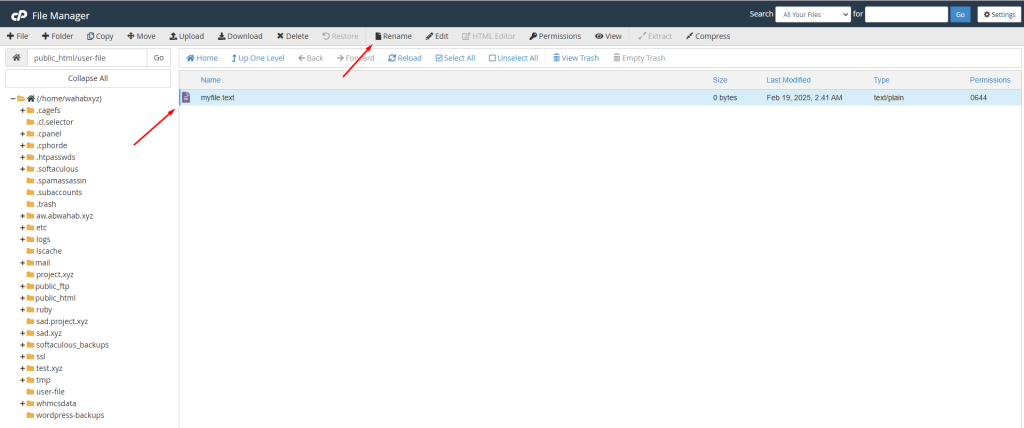
A new window will appear, prompting you to enter the desired new name for the file.
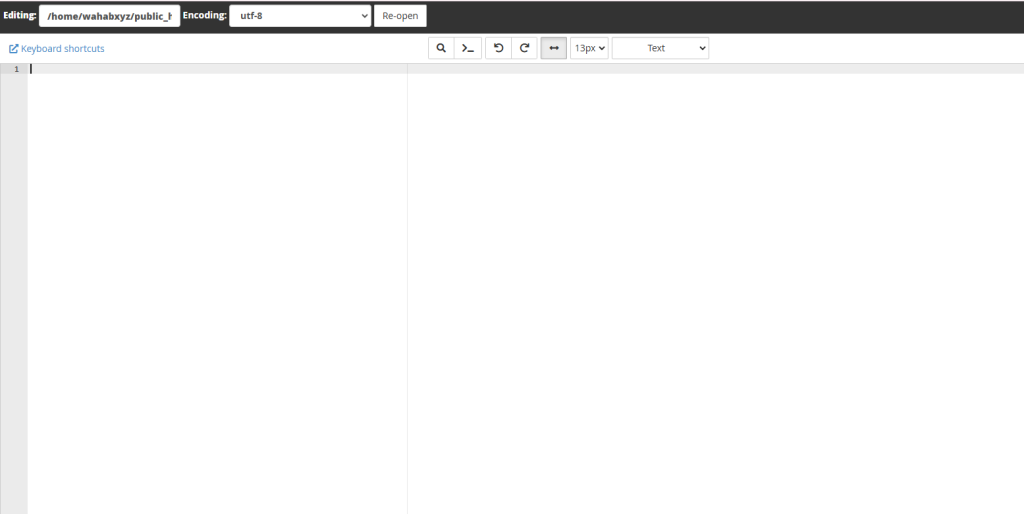
The file editor is intuitive, so its functions won’t be covered in this tutorial. You should be able to easily explore its features.
For HTML files, an optimized HTML editor is available in the “Actions View,” next to the “Edit” button. This provides a specialized editing experience.
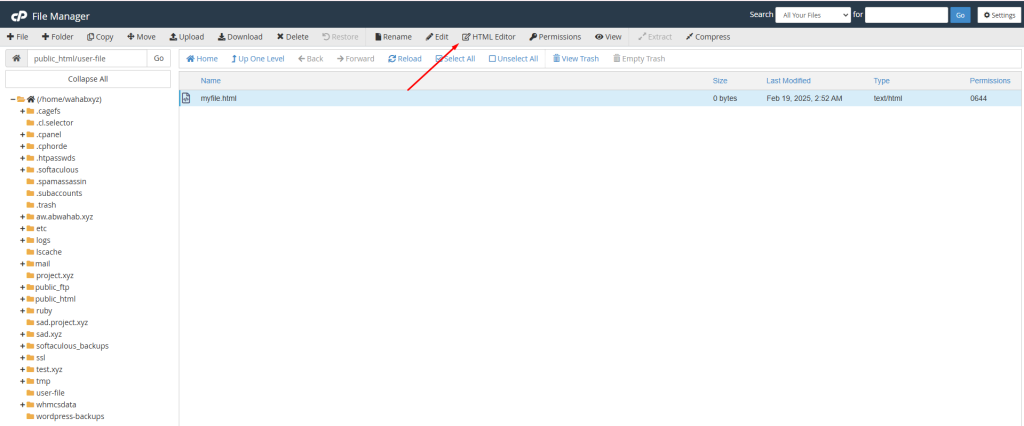
The HTML editor is a WYSIWYG editor, letting you edit both the content and the source code of your HTML files.
Setting Permissions for Files/Folders
Here’s a paragraph-wise modification of the provided text:
UNIX-based systems use security permissions to protect files and folders. While these are typically managed via the command line, cPanel’s File Manager offers a user-friendly permissions manager. To view or change file permissions, select the desired file or folder and click the “Permissions” button in the “Actions View” section.
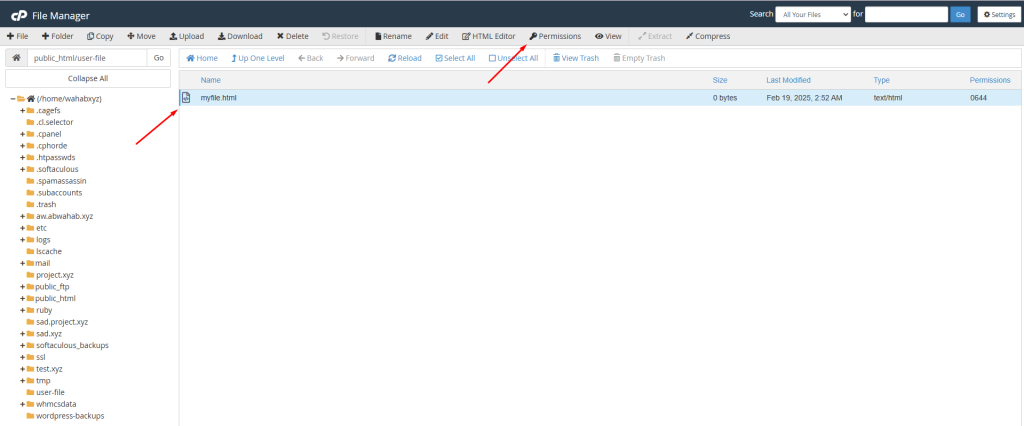
The Permissions window will open, allowing you to fully manage and customize permissions. Remember, the defaults are 644 for files and 750 for folders.
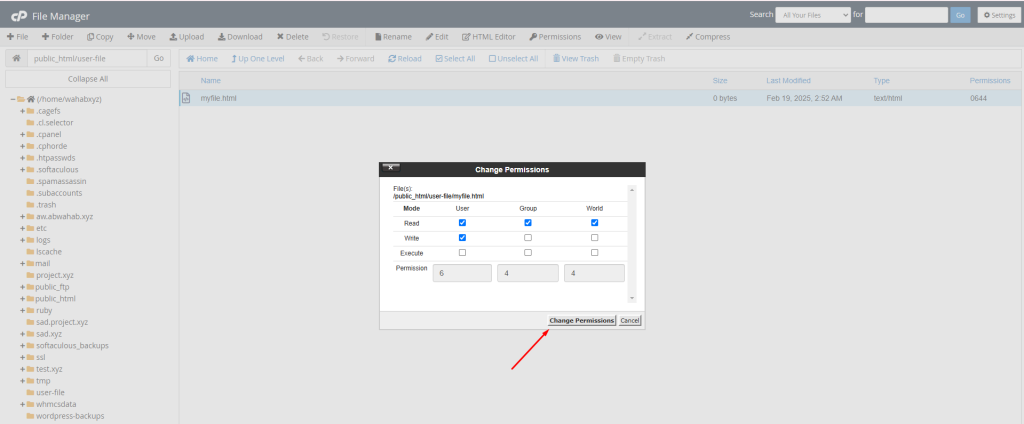
Clicking the “Change Permissions” button will apply the new permissions to the selected file or folder.
Compressing/Extracting Archives
Beyond file operations, the File Manager also lets you compress and extract archives. Let’s start by creating one. You can create archives containing files or folders. We’ll archive the “user-files” folder, which is in the home directory, so we’ll select it in the “Folders Tree View.”
Next, locate the “user-files” folder in the “Folder Content View.” Select the folder, and then click the “Compress” button.
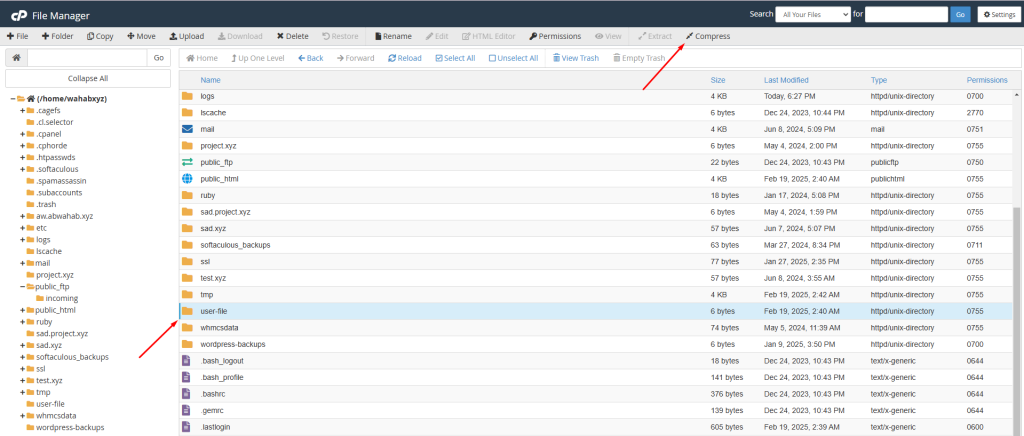
A new window will appear for archive settings. We recommend the GZipped Tar format for best compression. The location defaults to your current folder, but you can change it.
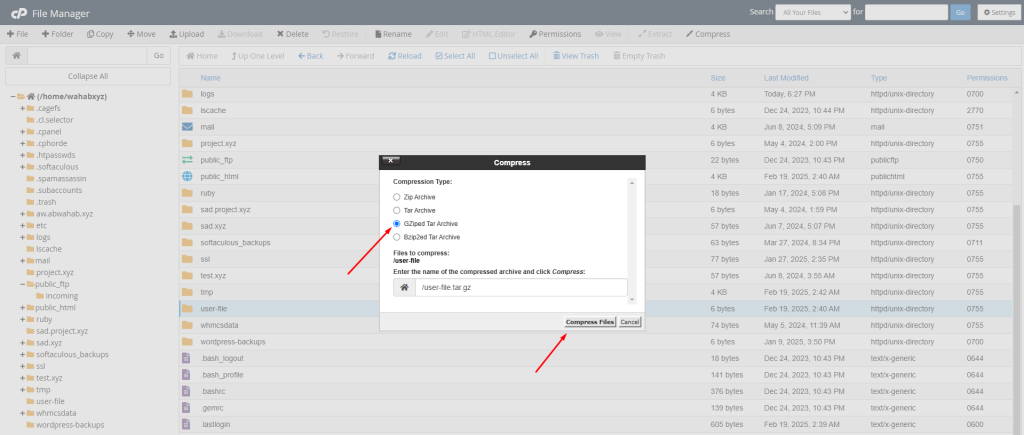
Clicking “Compress File(s)” starts the archiving process. A “Compression Results” window will appear listing the compressed files.
Extracting is even easier. Select the archive and click “Extract” in the “Actions View” section.
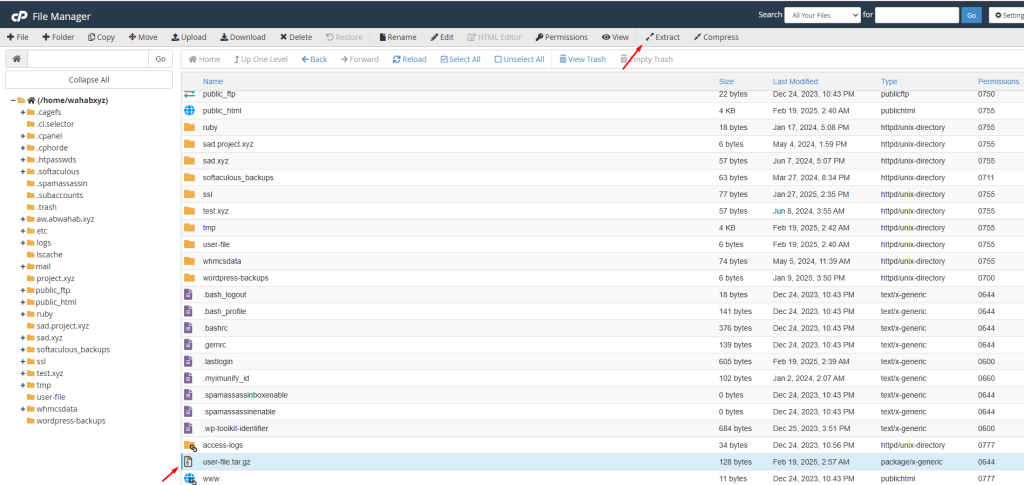
A new window will appear asking for the extraction location. If you want to extract to the current folder, leave the path as is and click “Extract Files.”
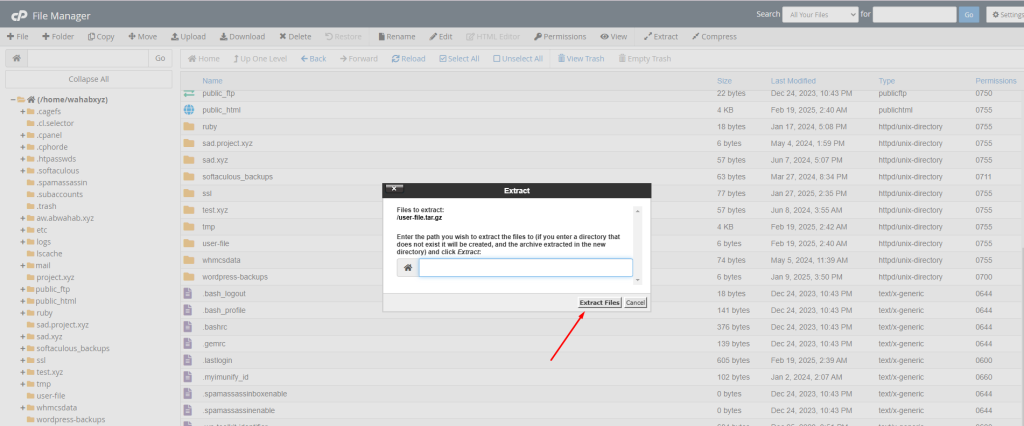
After extraction, an “Extraction Results” window will appear. Be aware that existing files with the same names will be overwritten.
That’s it! The know-how on how to manage the files of your hosting account. If you still do not feel confident enough to do this on your side, please feel free to contact our Technical Team and ask them to help you out. They are 24/7 available at your disposal through the ticketing system in your Client Area.


