Introduction
In 2026, speed isn’t just a “nice-to-have”—it is a critical ranking factor for Google and a dealbreaker for your visitors. If your site takes longer than 2 seconds to load, you’re likely losing over 40% of your potential traffic.
While many caching plugins exist, none are as powerful as LiteSpeed Cache (LSCache). Unlike standard plugins that run at the “PHP level,” LiteSpeed works at the server level. This means it can serve your pages almost instantly, without the server having to do heavy lifting every time someone visits.
Because Gotmyhost uses LiteSpeed Enterprise servers, you already have the engine. Now, let’s show you how to drive it.
Step 1: Install and Activate the Plugin
The LiteSpeed Cache plugin is free and acts as the remote control for the powerful caching engine built into our servers.
- Log in to your WordPress Dashboard.
- Navigate to Plugins > Add New.
- Search for “LiteSpeed Cache”.
Click Install Now, then click Activate.
Step 2: Active LiteSpeed Cache Plugin
Connect to QUIC.cloud
Connecting to QUIC.cloud is required to utilize the plugin’s features. You can choose to connect anonymously or register (e.g., via Google) to access all functionalities.
If you are not prompted for this, then you are probably using an older version of LiteSpeed Cache. In that case you can activate the plugin by manually requesting a domain key see the section Request domain key below for those instructions.
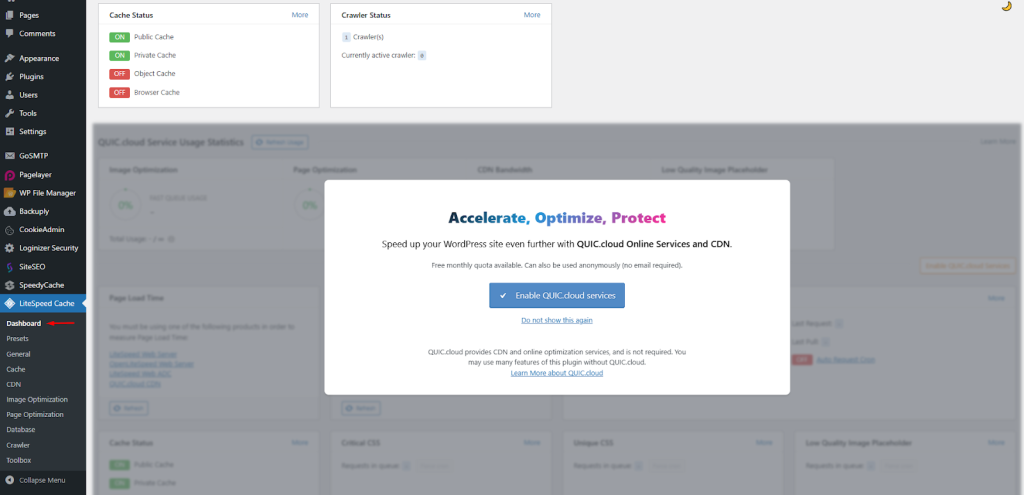
- In the WordPress Dashboard, on the left side click LiteSpeed Cache and then Dashboard.
- A welcome screen appears where you can click Enable QUIC.cloud.
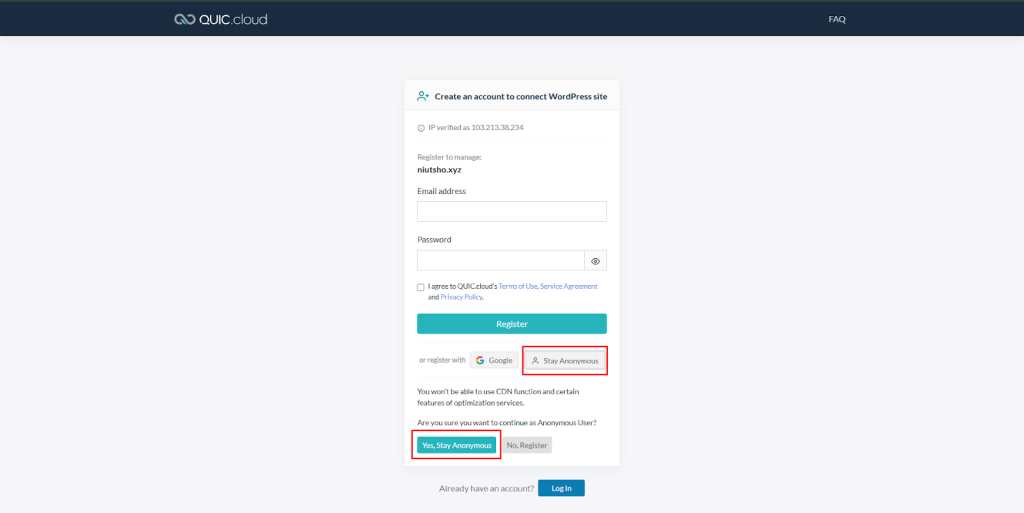
3. You will be redirected to the QUIC.cloud login page:
- Choose Stay Anonymous if you do not want to create an account (see image below).
- Or choose Register or Login through Google if you want to link an account.
4. After confirming, you will be returned to your WordPress environment.
Step 3: Request Your Domain Key (For Advanced Features)
With the domain key you authorize your website with the LiteSpeed optimization servers. If you want to use functionality such as optimizing your images and/or CDN, you will need a domain key.
- Go to LiteSpeed Cache > General.
- Click the Request Domain Key button.
- Wait a few minutes (you can refresh the page), and you’ll see your key appear automatically.
Note: This step is no longer necessary as of version 7.0.0.1 of LiteSpeed. If you are using this or a newer version of LiteSpeed, you can now proceed to the section Setup a cache-preset.
Step 4: Enable Basic Caching (The “Quick Fix”)
Once activated, you need to ensure the main caching engine is turned on.
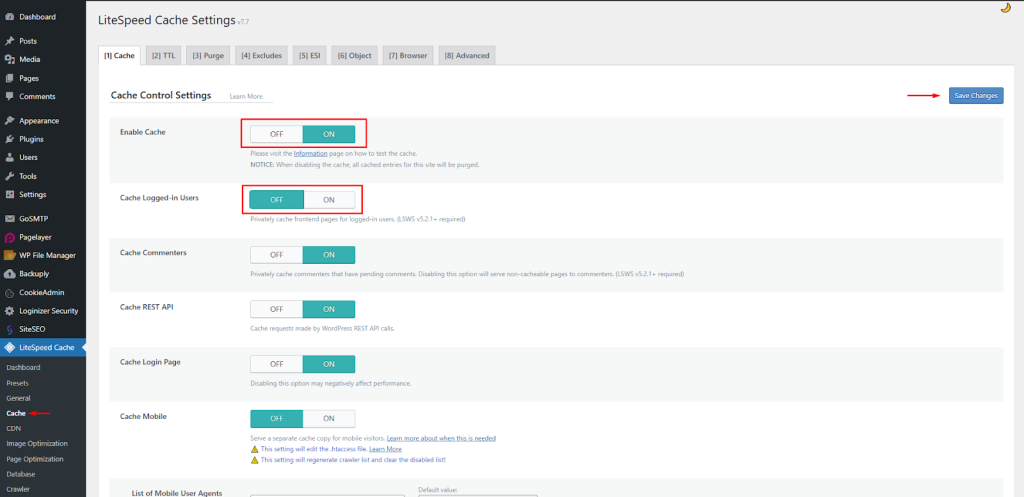
- Navigate to LiteSpeed Cache > Cache.
- In the Cache, ensure Enable Cache is set to ON.
- (Recommended) Turn Cache Logged-in Users to OFF if you are the only one editing the site, to ensure you always see your changes live.
- Click Save Changes.
Step 5: Optimize Your Images Automatically
Large images are the #1 cause of slow websites. LiteSpeed can automatically shrink them and convert them to the modern WebP format.
- Go to LiteSpeed Cache > Image Optimization.
- Go to the Image Optimization Settings tab.
- Switch Auto Request Cron to ON. This tells the plugin to automatically optimize every new image you upload.

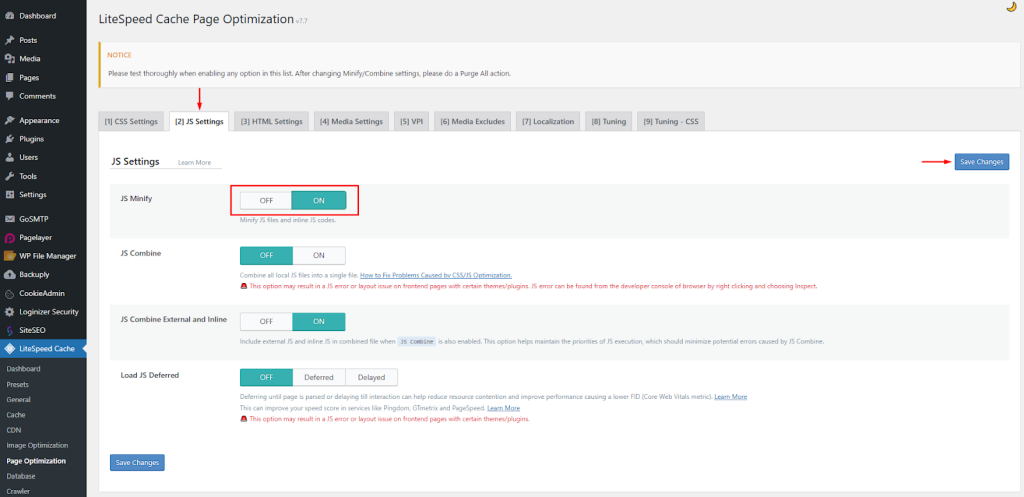
Step 6: Page Optimization (Minify & Combine)
This step “cleans” your code by removing unnecessary spaces and combining files so the browser has less to download.
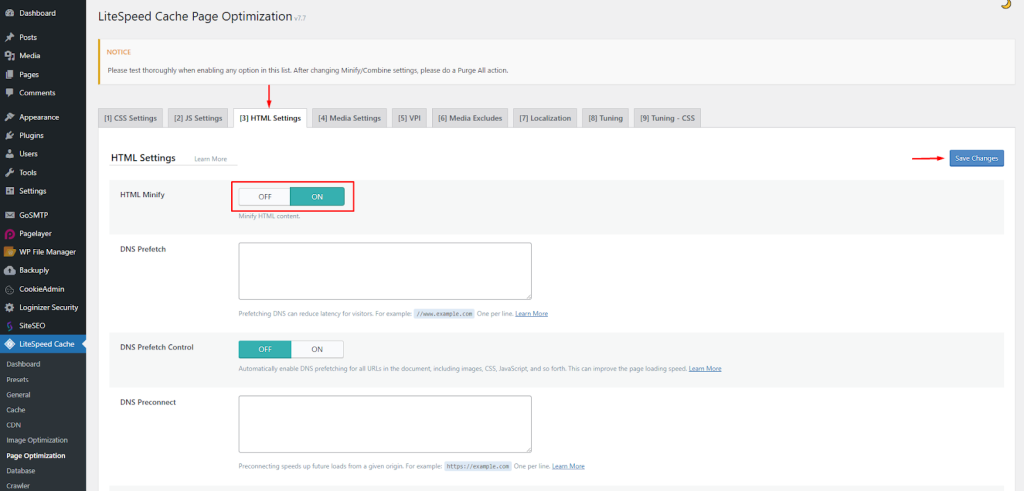
- Go to LiteSpeed Cache > Page Optimization.
- Under the CSS Settings tab, turn on CSS Minify.

- Under the JS Settings tab, turn on JS Minify.
- Under the HTML Settings tab, turn on HTML Minify.
Pro Tip: If your site’s layout looks “broken” after this step, simply turn off “CSS Combine” or “JS Combine.” Minification is safe, but “Combining” can sometimes cause conflicts with certain themes.
Step 6: Clean Your Database
Over time, WordPress accumulates “junk” like old post revisions and deleted comments. This slows down your server’s database.
- Go to LiteSpeed Cache > Database.
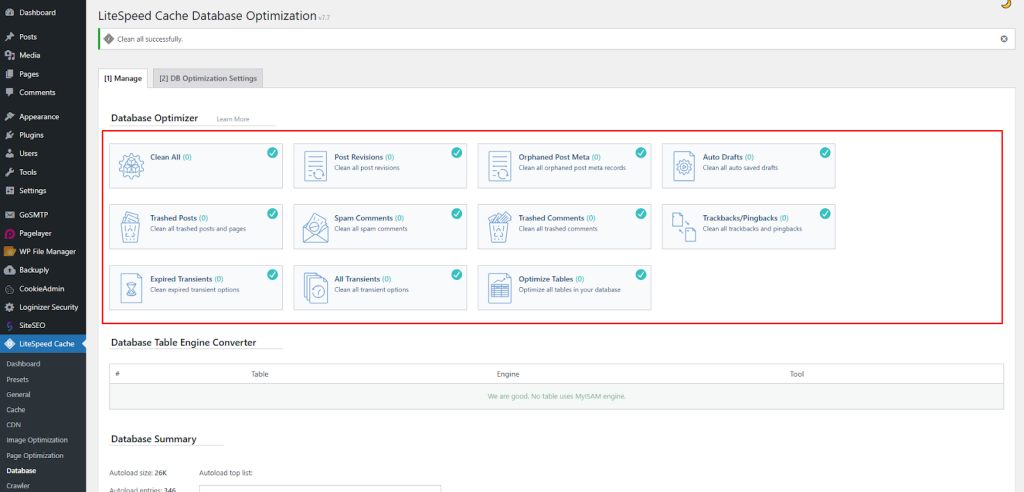
- Click Clean All.
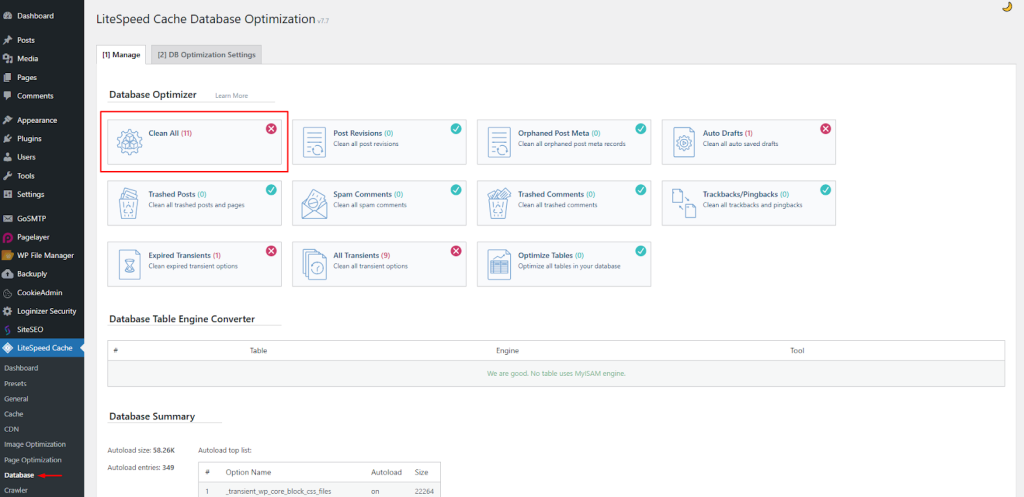
- This won’t delete your posts or pages; it only removes the hidden “bloat” that slows your site down.
Why LiteSpeed Works Best on Gotmyhost
Many hosts use older Apache technology, which is like a reliable old sedan. LiteSpeed is a supercar. When you use the LiteSpeed plugin on a Gotmyhost server, you get:
- Server-Level Caching: Bypasses PHP to serve pages in milliseconds.
- ESI (Edge Side Includes): Allows you to cache “logged-in” pages while still showing dynamic content like shopping carts.
- QUIC.cloud Integration: A global network that makes your site fast for visitors in London, New York, or Tokyo.
Ready for a Faster Website?
If you haven’t seen a massive jump in your PageSpeed score after following these steps, our support team is here to help. At Gotmyhost, we can even help you configure these settings specifically for your unique theme or store.
Related Topic : How to Install WordPress Cache Plugin
