Use these steps to Install & Disable WordPress Plugins:
- Log in to your WordPress
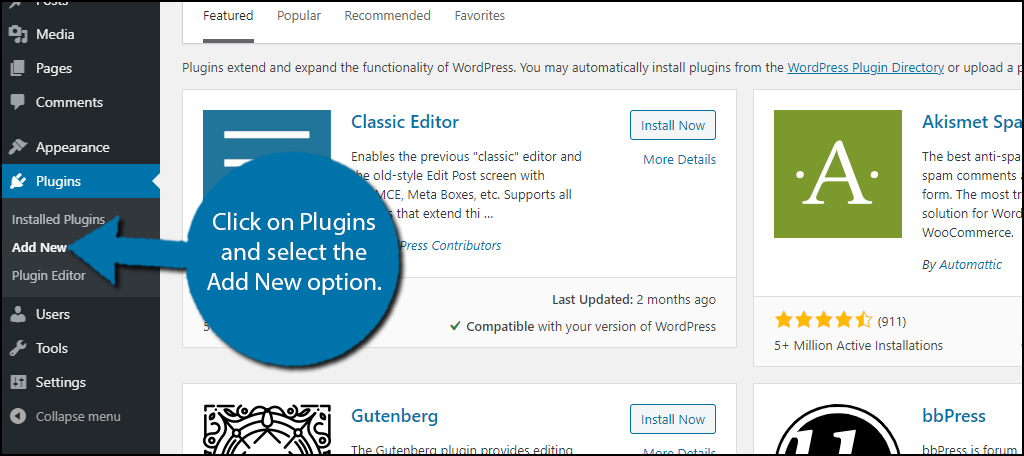
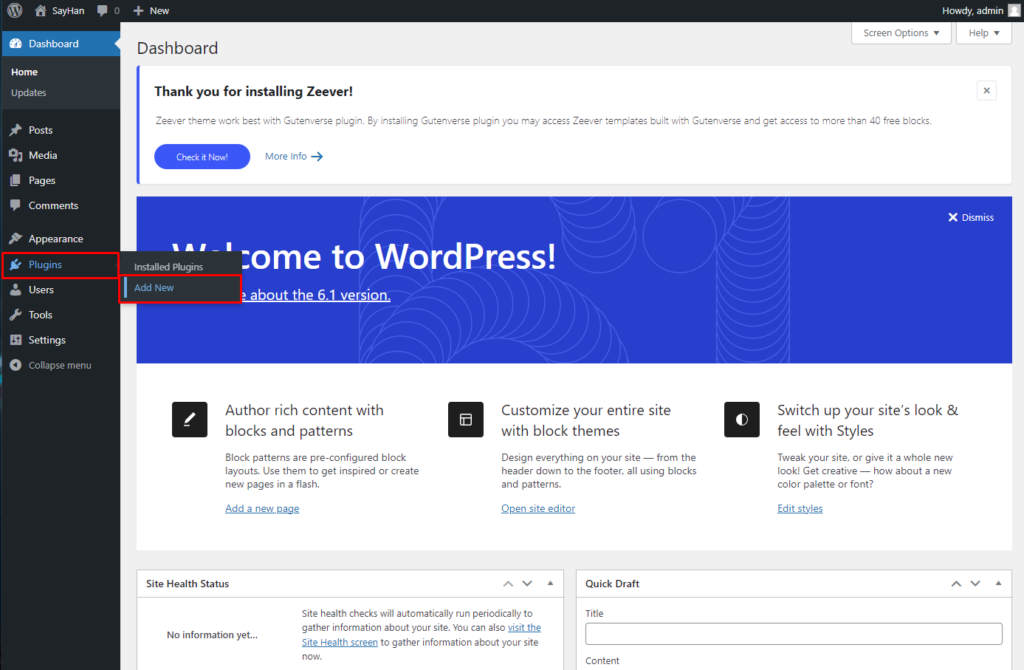
- Hover on Plugins from the left side of the WordPress menu bar and click on Add new
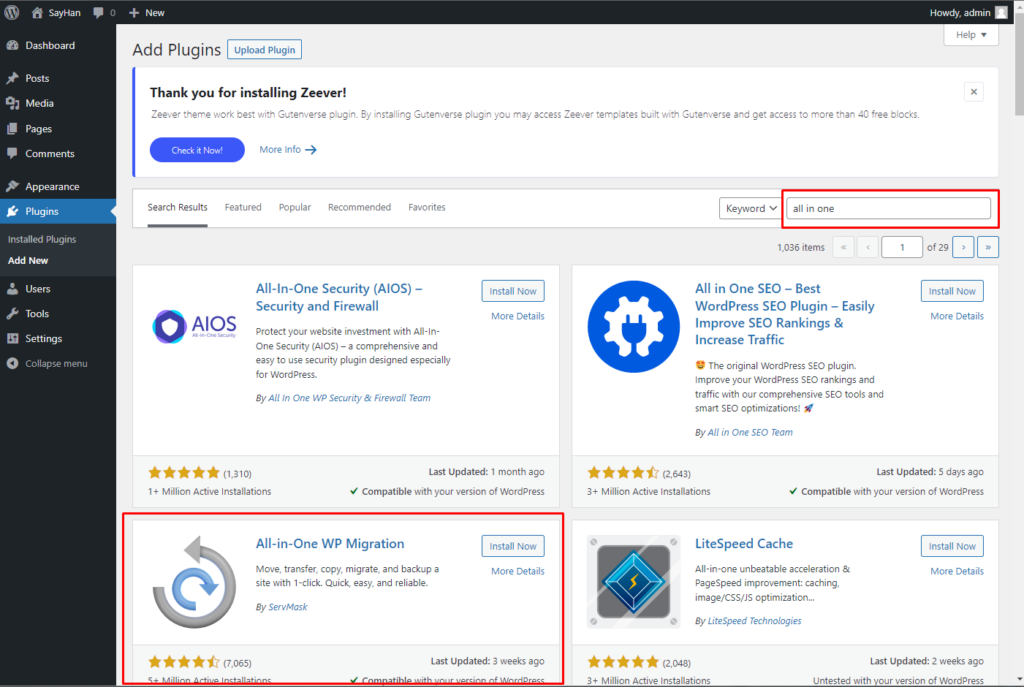
3. You can select your desired plugins here or you can search for your desired plugins from the Search Plugins option, as below seen –
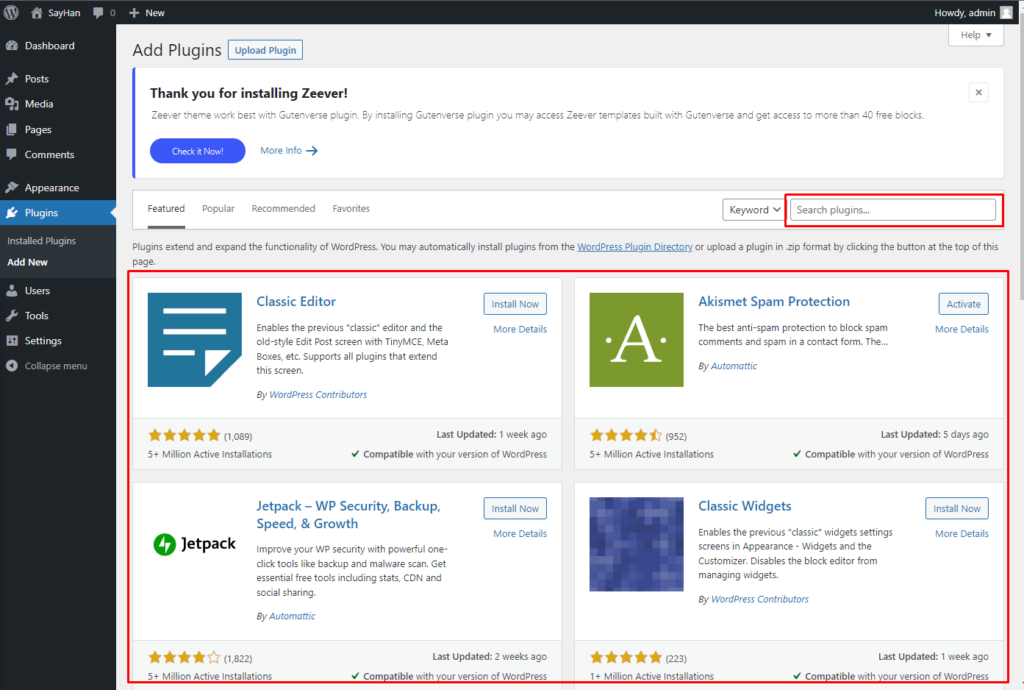
For example, if you want to install “All-in-One WP Migration” search it in the Plugin search option
4. Click on Install now
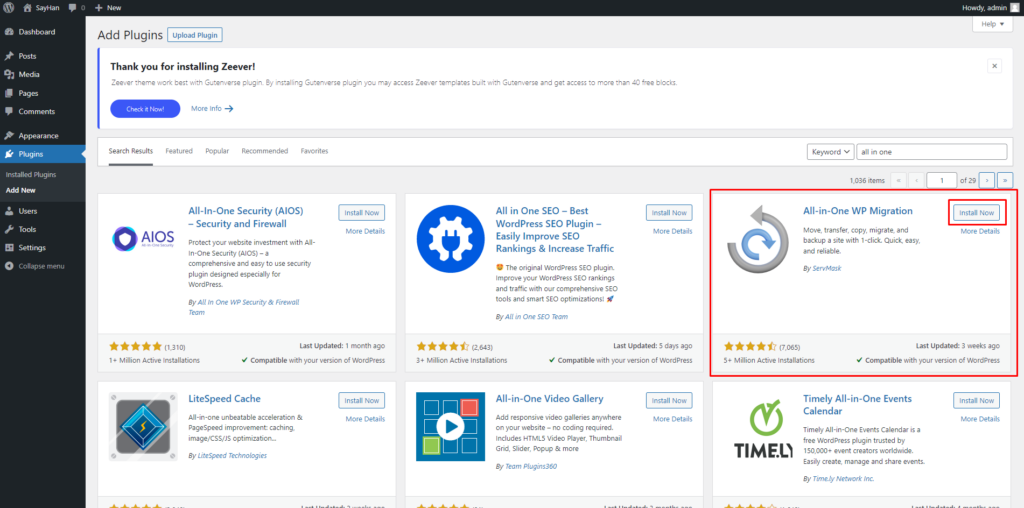
5. Click on Activate

Then it will take you to the plugins dashboard Where you can see all your installed activated/deactivated plugins. As below seen –
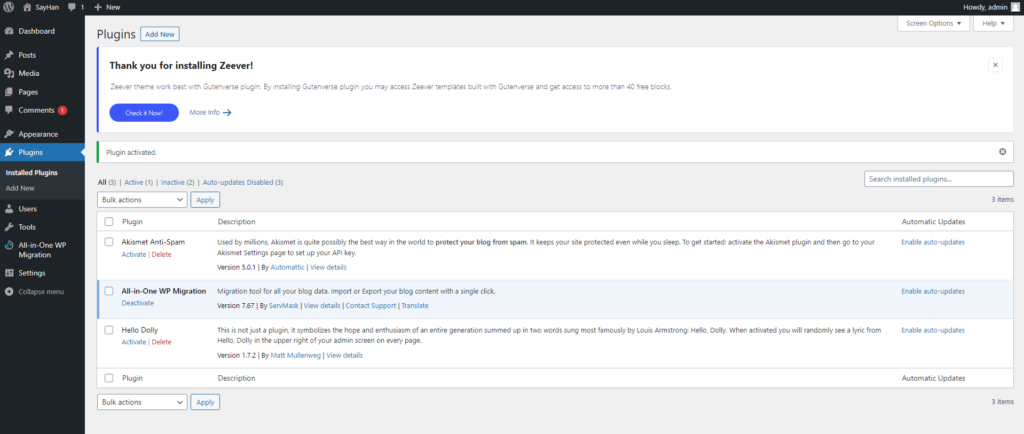
Here you can activate or deactivate and delete your plugins
- Click on deactivate which you wish to deactivate or delete
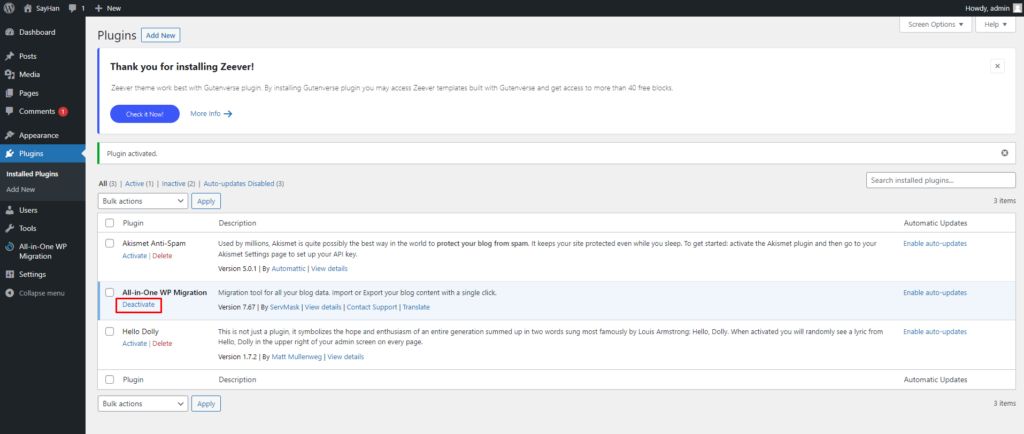
2. Click on delete if you want to delete the plugin

Then it will show you a pop-up window, click on ok. as below seen

The plugin deactivation and deletion are done.
That’s all about plugin installation, deactivation, and deletion.
if you face any issues in the process knock the technical team in the live chat or submit a tciket in our panel. They will assist you.


