Table of Contents
Step 1 – Change the nameservers to set up a cPanel addon domain
To begin with, you will need to point your domain name to our hosting nameservers:
- For Shared Hosting plans: dns1.gotmyhost.com and dns2.gotmyhost.com.
- For Reseller Hosting: your private nameservers or Reseller Hosting nameservers specified in your Welcome Email.
If your domain name is registered with a third-party registrar, contact their customer support and ask to change the nameservers for your domain name to the aforementioned ones.
Step-2. Add the new domain as an Addon Domain
If the domain name is pointed to our hosting nameservers, it can be added to your hosting account right away.
Step-3. Log into your cPanel. For the quick access, you may use Cpanel shortcut.
Domains section >> Domains:
For cPanel Basic Theme:
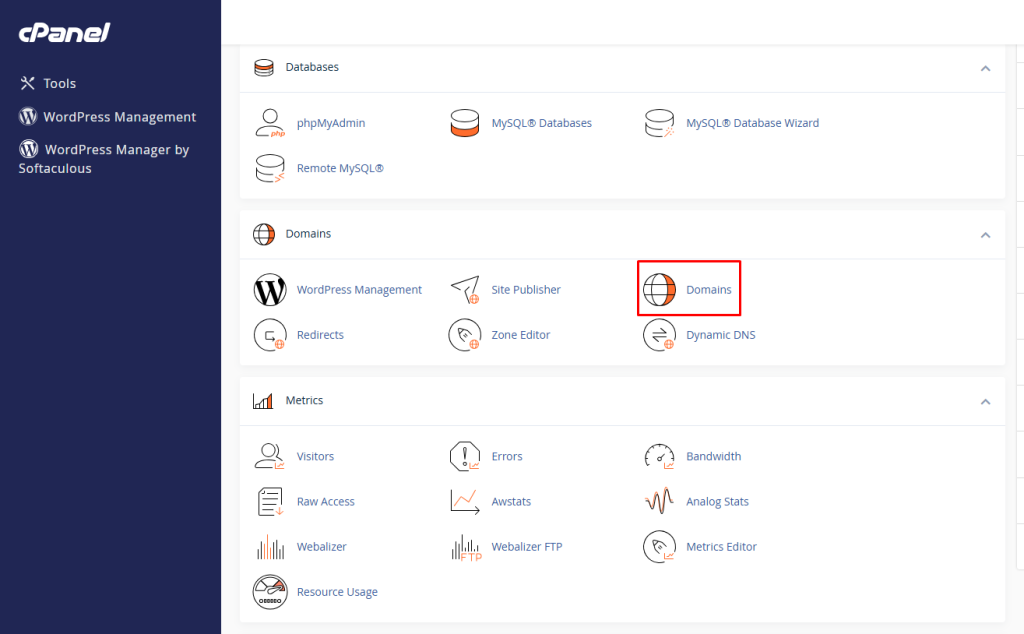
Step-4. Click on Create A New Domain.
For cpanel Retro Theme:

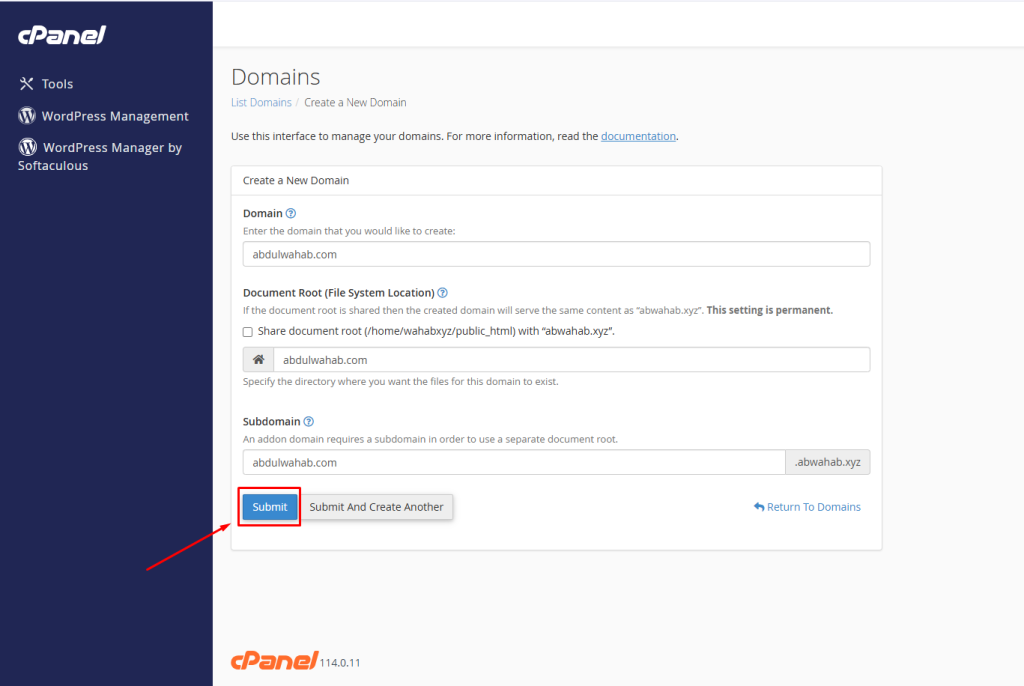
Step-5. Enter the necessary information and click submit.
- New Domain Name: Domain name you wish to add as an addon
To avoid the error message, That is not a valid domain, make sure there are no extra spaces before and after your addon domain name. - Subdomain: will be filled in automatically
- Document Root: will be filled in automatically
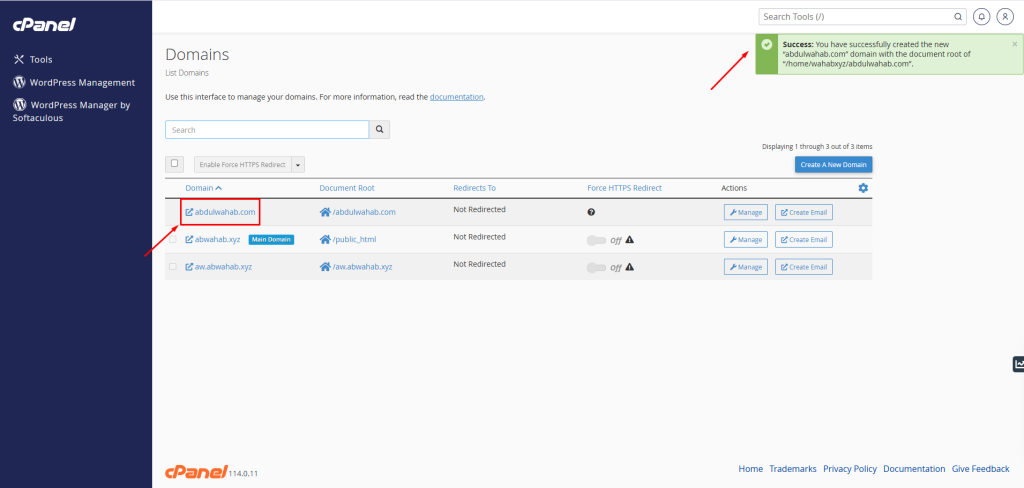
Step-6. Review the addon domain.
After adding the addon domain a pop-up message will be shown like below.
To change the cPanel password


