To Install WordPress Cache Plugin follow the steps:
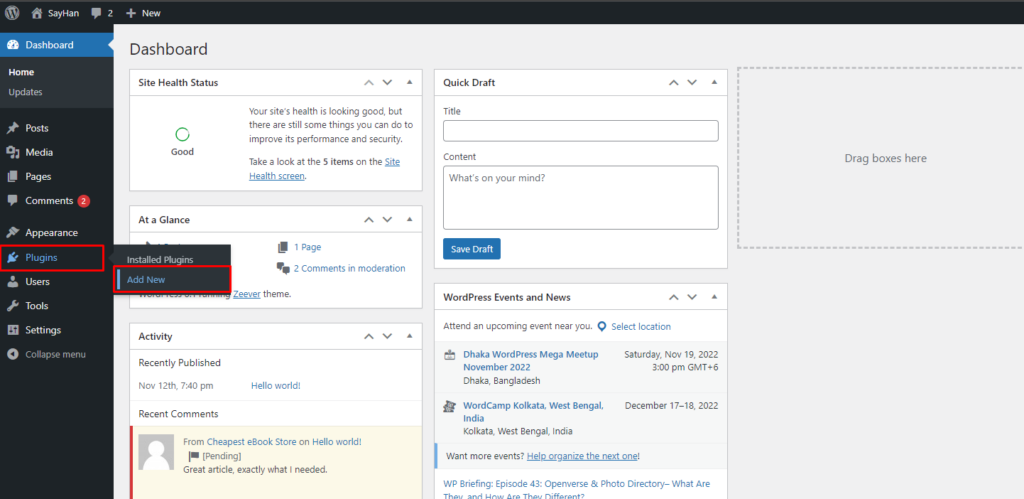
- Log in to your WordPress dashboard.
- Hover on Plugins from the menu bar of your WordPress dashboard and click Add new
3. Search for the desired cache plugin you wish to install.
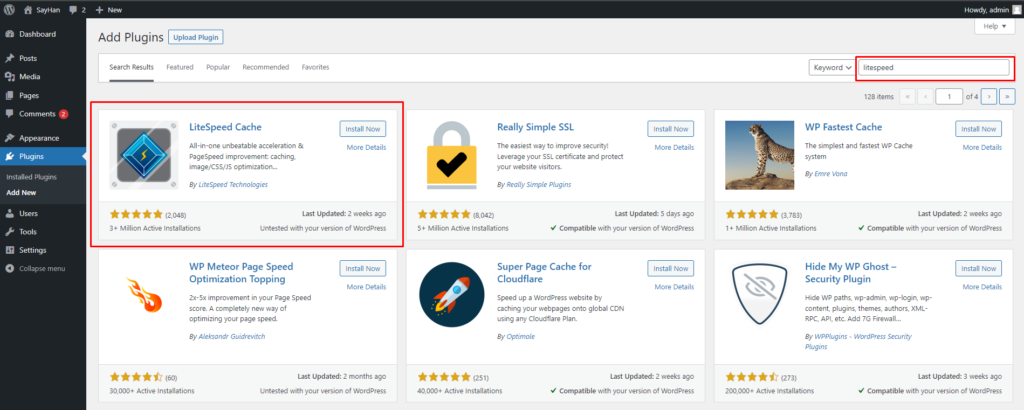
Here, I will install the Lite Speed Cache plugin. You can install another plugin such as W3 Total Cache or you can install a paid plugin by clicking Upload Plugin. As below seen –
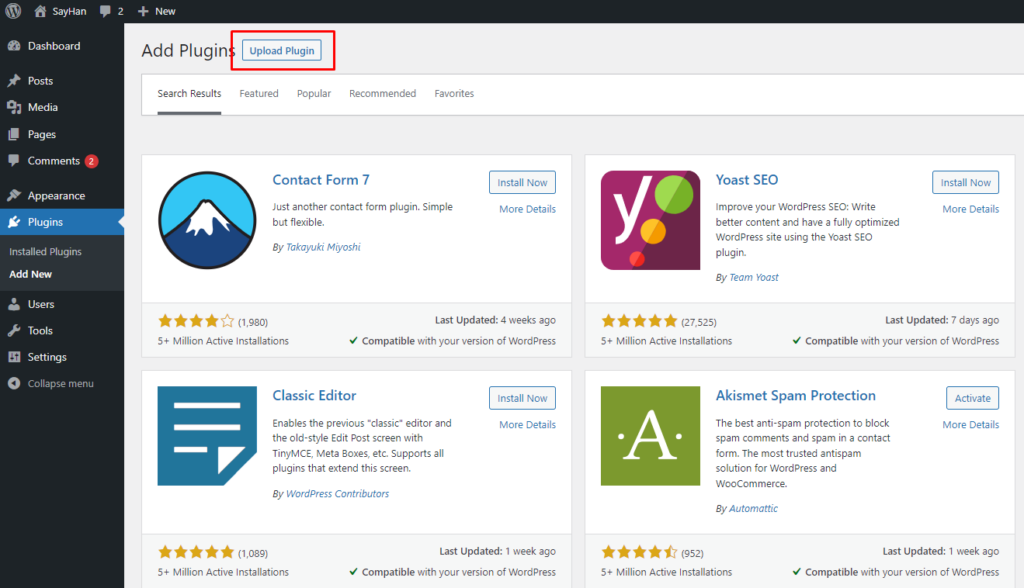
Then click Choose File

4. Click Install Now

5. Click Activate

WordPress Cache Plugin installation is done.
if you face any issues in the process knock the technical team in the live chat. They will assist you.
WordPress update failed! Stuck in WordPress Maintenance Mode


